Quick Takeaways: Lifted Brow Look Mornings can feel long before the day even starts. You can wake up, do […]

Quick Takeaways: Lifted Brow Look
- Brows are often the first place tiredness shows
- A lifted brow look relies on shape, direction, and clean edges
- The technique uses a spoolie, a brow pencil, and clear gel
- Small placement adjustments create a noticeable shift
- The result feels polished, balanced, and easy to maintain

Mornings can feel long before the day even starts. You can wake up, do your skincare, apply makeup, and still feel like your face looks flat or weighed down. For many people, that feeling is not coming from the skin or eyes. It comes from the brows.
Brows frame the eyes and sit at the center of expression. When they soften, droop at the tail, or lose direction, the entire face can read as tired even when the rest of your makeup looks finished. This often happens gradually, so it is easy to miss.
A lifted brow look is a simple makeup technique that focuses on guiding the brows into a more intentional position. This approach relies on understanding placement, direction, and restraint. It works as an easy brow shaping routine you can repeat daily once the logic clicks.
Step 1: Map the Brow Shape
Mapping is the quiet foundation of any successful lifted brow look. Without it, the rest of the steps can feel uneven or unbalanced.
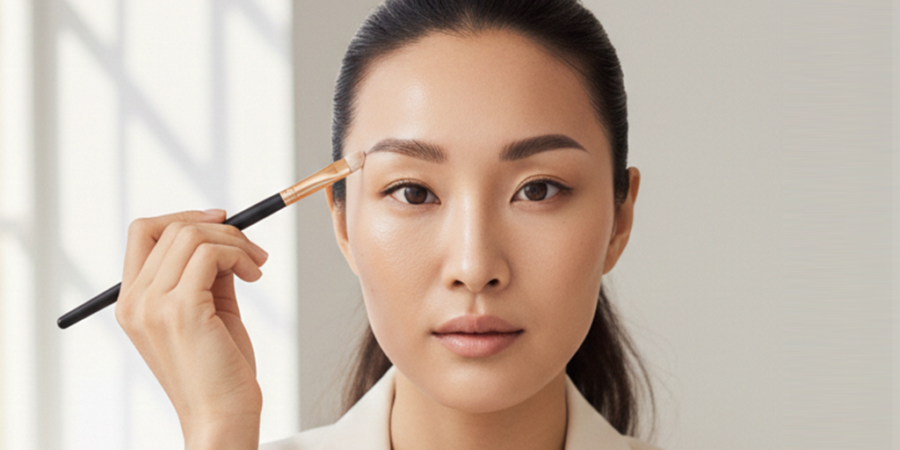
Start with clean, dry brows. Using your brow pencil, lightly mark three points on each brow. The first mark shows where the brow begins near the inner corner. The second marks the highest point of the arch. The third marks where the tail should end.
This is a brow mapping for lift technique, so the tail placement matters most. Instead of following the natural downward slope, place the tail slightly higher and a touch outward. This subtle shift helps prevent the outer corner from pulling the eye down.
Keep your marks faint. They should act as guides rather than outlines. When you look straight ahead in the mirror, both brows should feel balanced and intentional.

Last update on 2026-01-15 / Affiliate links / Images from Amazon Product Advertising API
(As an Amazon Associate, we earn from qualifying purchases.)
Chic Tip:
If you are unsure where your arch should sit, raise your brows gently and notice where they naturally peak. That point often gives the most flattering guide.
Step 2: Brush and Lift with a Spoolie and Clear Gel
Once the shape is mapped, use a spoolie to brush the brows upward. Start at the front of the brow and brush straight up. As you move toward the middle, angle the hairs slightly outward. At the tail, keep the direction outward and lifted.
Apply a light layer of clear gel as you brush so the hairs stay in place. This step does more than hold the brows. It reveals natural density and direction, which helps guide the rest of the lifted brow makeup technique.
Many people notice here that they need far less pencil than expected. Lifting the hairs creates structure without adding color.
Pause briefly to let the gel begin to set before moving on.
Chic Tip:
Wipe excess gel off the spoolie before applying. A lighter layer gives better control and keeps brows flexible.
Step 3: Fill with Light Pencil Strokes
With the brows brushed and lifted, filling becomes more intuitive. You can clearly see where skin shows through and where hair already provides coverage.
Use your brow pencil to add short, light strokes only in sparse areas. Follow the direction of the lifted hairs rather than drawing straight lines. This keeps the brow looking soft and natural.
Focus most of your effort through the arch and tail, where shape matters most. Keep the front of the brow lighter so it does not look heavy or blocky. Step back from the mirror occasionally to check balance.
This step should feel like support rather than construction.

Last update on 2026-01-15 / Affiliate links / Images from Amazon Product Advertising API
Chic Tip:
Hold the pencil farther back instead of gripping it tightly near the tip. This naturally softens pressure and prevents harsh lines.
Step 4: Set and Hold the Lifted Brow Look
To lock everything in, apply another thin layer of clear gel. Brush upward and outward again, following the same pattern used earlier.
This step ensures the lifted brow look holds its shape throughout the day. It also helps blend pencil strokes into the brow hairs so everything looks cohesive.
Allow the gel to dry fully before touching the brows again. If the brows feel stiff, too much product was used. A flexible hold looks more natural and wears better.
Chic Tip:
Instead of brushing repeatedly, press the spoolie gently against the brow hairs to set their direction without disturbing the shape.
Step 5: Clean and Sharpen the Edge
The final step brings clarity to the entire look. Cleaning the lower edge of the brow creates contrast, which makes the lift more visible.
Use a small amount of your usual base product to trace under the arch and tail. You do not need to clean the entire brow. Focus on the outer half, where lift shows the most.
Blend the edge softly into the skin so it looks intentional rather than sharp. This detail often makes the biggest visual difference, especially in natural light or photos.
Chic Tip:
If cleanup feels intimidating, start with just the tail. Even a small adjustment there can shift the whole brow.
Why This Brow Placement Changes the Look
This lifted brow look works because it changes direction and emphasis rather than adding bulk. Brows that angle upward and outward visually open the eye area. Clean edges add structure. Light filling preserves softness.
Rather than layering more product, you are refining what already exists. This makes the technique wearable, adaptable, and ideal as an everyday lifted brow look.
Each step builds on the last. Skipping one does not ruin the result, but completing all five creates the most balanced effect.

Last update on 2026-01-15 / Affiliate links / Images from Amazon Product Advertising API
Extra Tips That Make This Easier?
Keep these in mind if your brows tend to shift or fade.
- If your brows drop during the day, re-lift with a clean spoolie instead of adding more product.
- If one brow sits lower, adjust the tail placement rather than filling heavier.
- If you wear minimal makeup, keep the brow front extra soft to maintain harmony.
These small habits make the routine easier to maintain as part of a daily makeup flow.
Wrapping It Up
Once you understand the placement, this routine truly takes about five minutes. It becomes a small reset for the face, especially on mornings when everything else feels rushed.
Try this lifted brow look and notice how your eyes and expression feel afterward. If you test it, share what surprised you or which step made the biggest difference.
You can find more techniques like this throughout our makeup tutorials, where small adjustments are broken down into steps that actually fit real mornings.
How do you get a lifted brow look with makeup?
You can get a lifted brow look by slightly adjusting brow shape, brushing hairs upward, filling gaps lightly, and setting the brows so they hold their direction throughout the day.
What is the easiest way to lift brows with makeup?
The easiest way is a simple brow routine that focuses on upward brushing, light pencil strokes, and clean edges rather than heavy filling or reshaping.
Why do my brows make my face look tired?
Brows that droop at the tail or lose direction can pull the eye area down, which makes the face look more tired even when the rest of your makeup looks done.
How do you lift brows without overfilling them?
A lifted brow look works best when you fill only sparse areas, keep the front soft, and rely more on direction and cleanup than adding extra product.
How do I lift the outer corner of my brows?
Lifting the outer brow starts with mapping the tail slightly higher and brushing it outward. Cleaning the lower edge of the tail also helps make the lift more visible.
Can a lifted brow look work for everyday makeup?
Yes. A lifted brow look works well as an everyday brow routine because it stays natural, soft, and easy to repeat once you learn the placement.