Quick Summary: Watercolor Blush Tutorial Why Everyone Is Suddenly Doing This The sculpted, Instagram-contoured face had its decade. In Spring […]

Quick Summary: Watercolor Blush Tutorial
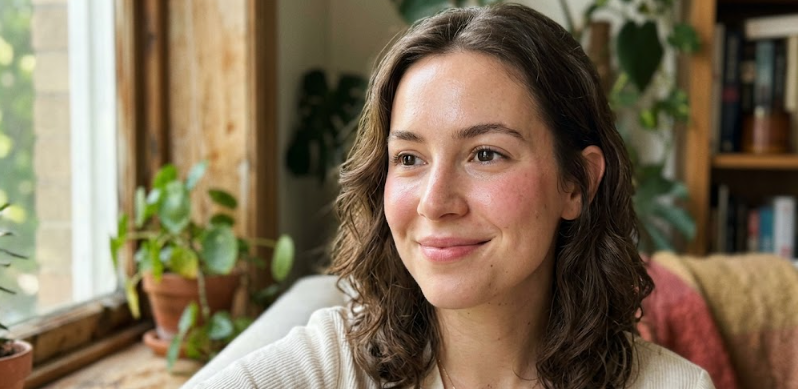
- What it is: Watercolor blush is a sheer, diffused flush of color placed at the center of the cheeks, built in light layers for a romantic, painterly finish.
- Why it looks different: Unlike traditional blush applied with a brush in sweeping motions, the watercolor blush technique uses fingertips to pat a tiny amount of cream blush into skin, no sharp edges, no obvious placement lines.
- The key rule: Thin layers, patted (never swept). One dab of cream blush is more than enough to start.
- Best product: A sheer cream blush with a buildable formula. Drugstore picks like Maybelline Dream Blush or e.l.f. Putty Blush work just as well as high-end versions for this look. Note: shade testing across skin tones is not fully documented in current tutorials, deeper complexions should choose warm mauves, corals, and berries rather than sheers or pinks for best visibility.
- Who it is for: Everyone. The technique is beginner-friendly because cream blush adjusts before it sets, giving you time to blend.
- What makes it spring 2026: It is the direct counter to the sculpted contour era. Soft, airy, and skin-first, this is the look Allure, TikTok, and every editorial direction are pointing toward right now.

Why Everyone Is Suddenly Doing This
The sculpted, Instagram-contoured face had its decade. In Spring 2026, the shift is unmistakable: sheer, romantic, painterly color is replacing bronzer-heavy structure everywhere from Allure editorials to TikTok’s For You Page.
This is not just a TikTok moment. Signal is confirmed across YouTube tutorials, Instagram Reels, WhoWhatWear tutorials, and Allure’s own Spring 2026 trend report naming this look directly.
Pantone’s 2026 color of the year, a muted cloud-toned white, is pushing makeup artists toward airy, diffused application. Watercolor blush is the technique that fits the cultural backdrop perfectly.
The One Technique Principle Most Tutorials Skip
Here is the thing the 15-second TikTok video will not tell you: the watercolor blush technique is not about how much product you use. It is about HOW you deposit it.
Sweeping blush across the cheek with a brush builds product in one layer. That is great for traditional placement, but it is exactly what creates a hard-edged, obvious look, the opposite of watercolor.
Patting deposits pigment in thin, diffused dots that your skin absorbs and softens at the edges. That is the diffused, “color from within” effect you see in every editorial.
Step-by-Step Watercolor Blush Tutorial
Step 1: Prep Is Not Optional Here
Moisturize before you do anything else. This is a structural step for the watercolor look, not a general skincare reminder.
Apply your regular moisturizer and let it absorb for 2-3 minutes. If you use a primer, a light skin-prep primer is fine.
Step 2: Choose the Right Product
You need a cream or liquid blush with a sheer, buildable formula. Stain-based products work beautifully because they set quickly and mimic the watercolor diffusion naturally.
- Drugstore: e.l.f. Putty Blush ($10, affiliate link) or Maybelline Dream Blush ($11, affiliate link), both buildable, both available in a range of shades
- Mid-range: Rare Beauty Soft Pinch Liquid Blush ($23, affiliate link), very pigmented, use a minimal amount
- High-end: NARS Blush Stick ($38, affiliate link), creamy, skin-like finish
Shade equity note: Shade testing across deeper skin tones is not fully documented in current spring 2026 watercolor blush tutorials.
Disclosure: This article contains affiliate links. We may earn a commission on purchases made through these links at no additional cost to you.
Step 3: Pick Up Less Than You Think You Need
Dab your fingertip (ring finger or index finger, your choice) into the blush product. Now wipe off half of what you picked up onto the back of your hand.
Step 4: Pat at the Center of the Cheek, Not the Apple
Placement for the watercolor look is different from traditional blush placement. Instead of sweeping upward toward the temples, you are centering the color on the meatiest part of the cheek, right below the pupil line.
The dots will connect and soften as you continue patting. Do not rub, rubbing removes product and creates streaks.
Step 5: Layer Slowly to Build Depth
One layer of this application will look beautifully sheer. Two layers builds the romantic, saturated flush that is the signature spring blush makeup 2026 look.
Do not add more than two layers for the watercolor effect. Three or more layers shifts this from watercolor blush into full pigment coverage, which reads as traditional blush, not the soft painterly finish you are building.
Common Mistakes That Kill the Watercolor Effect
- Sweeping instead of patting. This is the number one mistake. Sweeping creates product buildup in lines. Patting diffuses it. No amount of blending will fix a swept application, you have to start over.
- Skipping moisturizer. Dry skin grabs cream blush in patches. The diffusion does not happen. Prep is technique, not skincare advice.
- Using too much product in one go. Start with almost nothing. You can always add. Removing built-up cream blush without disturbing your base takes two minutes you do not want to spend.
- Placing it too high (near the eye socket) or too wide (near the ear). Watercolor blush lives in the CENTER of the cheek, not across the full cheekbone. Placement width is the second most common mistake after application method.
- Using a setting powder over it too early. If you dust setting powder directly over fresh cream blush, you will lift the product and dull the finish. Let cream blush set for at least 2-3 minutes before applying powder anywhere near that zone.
- Trying to match it to your existing contour. Watercolor blush works without contour. Pairing it with heavy sculpting undercuts the soft, diffused effect entirely. If you want this look to read correctly, keep the rest of your base light and skin-like. If you need a foundation primer that supports a soft base, check out our guide to primers that work with cream products.

Is This Technique Actually Worth Learning or Just a TikTok Moment?
Here is where editorial thinking splits. The trend-timing argument says: learn it now, it is viral, the moment is live.
The honest answer is both arguments are right and they point to the same action. Learn the sheer layering technique properly, right now, while the spring 2026 cultural moment is amplifying your results.
You are not learning a trend. You are learning a method that happens to be exactly right for the moment we are in.
Frequently Asked Questions
What is watercolor blush?
Watercolor blush is a makeup technique that creates a sheer, diffused flush of color on the center of the cheeks. It is named for how it looks: soft and painterly, like watercolor paint on skin, rather than the defined, sculpted placement of traditional blush application.
How do you do watercolor blush with cream blush?
Start with moisturized skin. Pick up a very small amount of cream blush on your fingertip, pat it into the center of the cheek in small pressing motions, and lift straight up.
What products work best for watercolor blush?
Cream blushes with sheer, buildable formulas work best. Liquid stains are also excellent because they absorb quickly and create a skin-flush effect naturally.
Is watercolor blush good for beginners?
Yes. Cream blush adjusts before it fully sets, which gives beginners time to blend, layer, or correct placement.
What is the difference between watercolor blush and regular blush?
Regular blush is typically applied with a brush in a sweeping motion across the cheekbones or temples, building color over a wider area. Watercolor blush uses fingertips, a patting (not sweeping) motion, and is placed at the center of the cheek only.
Can you do watercolor blush with powder blush?
You can get a similar soft effect with a very fluffy brush and a light-handed powder application, but it is harder to achieve the true diffused edge. Powder does not absorb into skin the way cream does.
Quick Poll
What made you vote like that? Drop your hot take in the comments!