
Quick Answer: Memorial Day Sparkle Eye Makeup Most people who’ve had a glitter eye look go sideways weren’t doing anything […]
Quick Answer: Memorial Day Sparkle Eye Makeup
- The most common glitter mistake is placing sparkle in the crease. Your target is the visible lid space you can see with your eyes open and relaxed.
- Always check glitter placement with your eyes open. Crease position shifts significantly once your lids are down, and what looks right eyes-closed tends to disappear under the brow bone.
- Your glitter formula type determines which primer you need before anything else. Liquid and gel glitters self-adhere; loose and pressed glitters need a tacky base or they’ll fall off by hour two.
- A dusting of translucent powder under your lower lash line before glitter touches your lid catches fallout at the source. Apply it first, sweep it away last.
- For hooded or monolid eyes, concentrate sparkle at the center of the visible lid rather than across the full lid. That placement keeps the optical lift instead of flattening it.
- With the right formula-primer match, a full memorial day sparkle eye makeup look takes under 10 minutes.

Most people who’ve had a glitter eye look go sideways weren’t doing anything wrong technically. They were using the right technique with the wrong formula setup. That mismatch is why someone can follow a quick glitter eyeshadow tutorial step for step and still end up with sparkle halfway down their cheek by noon.
This memorial day sparkle eye makeup guide fixes that by putting the decisions in the right order. You’ll pick your formula first, match your primer to it, set a fallout barrier, locate your actual placement zone based on your eye shape, and then apply. Seven steps, under 10 minutes, any eye shape.
Memorial Day weekend calls for something that reads well in daylight and still looks intentional at a backyard party after dark. Sparkle delivers both. Here’s how to get there without a second mirror check all day.
What “Sparkle Eye” Actually Means This Memorial Day Weekend
The sparkle eye that’s been building through 2025 and into 2026 isn’t the chunky glitter situation from 2004. It’s closer to a lit-from-within metallic finish with real dimension. Fine-particle glitter formulas, liquid chrome textures, and gel-based sparkle products catch light rather than scatter it. Beauty trend coverage from NYX Cosmetics places metallic and glitter finishes inside the dominant eye makeup movements for 2025 and 2026, alongside the aura beauty aesthetic that layers shimmer from lid to cheekbone.
For Memorial Day specifically, the color options are wider than red, white, and blue. Silver and icy champagne read patriotic without reading costume. Rose gold lands warm and festive. For the full red-white-blue nod, a navy liner under silver sparkle is the most wearable route. That color combination gets its own section below.
Here’s a solid place to start if you want a palette that covers all three color directions:
[AAWP BLOCK 1 — sparkle and glitter eyeshadow palettes, $8–18 range]
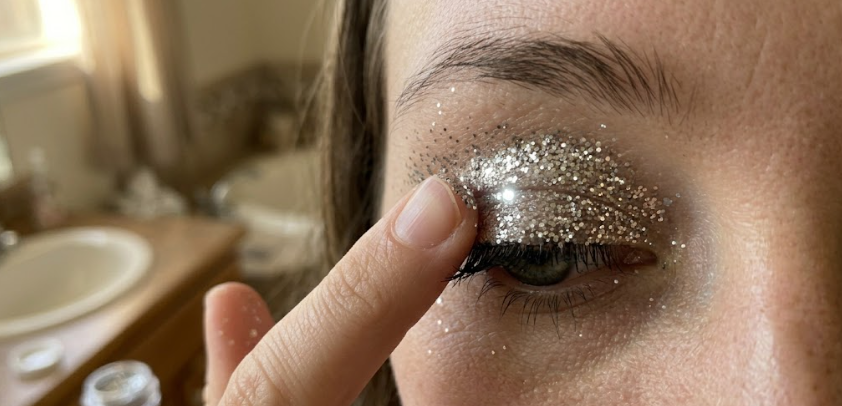
Step-by-Step Tutorial: Your 7-Step Memorial Day Sparkle Eye
Step 1 — Pick Your Glitter Format First
This is the decision that shapes every step after it. There are three distinct glitter formula categories and they each behave differently on skin.
Liquid and gel glitters use a doe-foot or wand applicator and a wet formula that dries down transfer-proof. They’re the most beginner-friendly option because they self-adhere, require no special primer, and produce almost no fallout on their own. The e.l.f. Liquid Glitter Eyeshadow and Stila Glitter and Glow are the most cited options in this category across editor testing and community reviews. If you’re doing an easy sparkly eye makeup for beginners look this weekend, liquid glitter is where to start.
Pressed glitter palettes work with a standard eyeshadow primer but deliver better payoff when the brush is lightly dampened with water or setting spray before you press into the pan. That small step changes how the particles transfer from pan to lid.
Loose glitter and loose pigment deliver the most intense sparkle and the most fallout if you use the wrong base. A standard eyeshadow primer won’t hold loose particles. You need a tacky glitter-specific primer as the adhesive layer before any loose product touches your lid. The NYX Glitter Primer is the most widely reviewed option in this category, with a 4.7-star average across several hundred verified purchases.
Pick your format. Then move to Step 2.
Nano Banana Prompt [Close-up, high-definition, GRWM-style portrait of a hand holding three distinct product formats over a white marble bathroom counter — a liquid glitter wand applicator, an open compact pressed glitter palette showing a silver pan, and a small jar of loose glitter pigment. Soft daylight from a window to the left. No brand logos or readable labels visible anywhere in the frame.]
Step 2 — Match Your Primer to Your Formula
Standard eyeshadow primer and glitter-specific primer aren’t the same product, and using one when you need the other is where most memorial day sparkle eye makeup looks fall apart before they start.
If you’re using liquid or gel glitter, a standard eyeshadow primer like the Milani Eyeshadow Primer or Wet n Wild Mega Last Eye Primer is all you need. Apply it across the lid, let it set for 30 seconds, and you’re ready.
If you’re using a pressed glitter palette, the same standard primer works. The upgrade is dampening your flat brush with setting spray before pressing it into the pan. That step pulls more pigment and locks it to the lid better than a dry brush does.
If you’re using loose glitter or loose pigment, skip the standard primer entirely and use a tacky glitter-specific primer instead. Apply a thin layer across the lid, wait 20 to 30 seconds until it’s just barely tacky but not wet, and then press the glitter into it. Don’t swipe. Press.
“Please do a video on the dreaded outer eye corner… and how to prevent creasing!” — YouTube comments
That request shows up constantly in glitter tutorial comment sections. The answer is almost always Step 2. Creasing in glitter looks happens when loose or pressed particles sit on top of a dry primer that doesn’t hold them, and body heat slowly migrates them into the crease over the first hour of wear. The tacky base solves this before it starts.
Here are the primers that work across all three formula types:
[AAWP BLOCK 2 — eyeshadow primer drugstore tier, and NYX Glitter Primer]
Nano Banana Prompt [Close-up, high-definition, GRWM-style portrait of a finger pressing a thin layer of eyeshadow primer across a medium-tan lid with almond-shaped eyes. The lid is bare and slightly matte from the primer just applied. Warm vanity lighting with a blurred white background. No product labels visible in the frame.]
Step 3 — Set a Fallout Barrier Before Glitter Goes On
This step takes 10 seconds and it’s the one that keeps sparkle off your cheekbones.
Before you pick up any glitter product, take a fluffy brush and dust a light layer of translucent setting powder directly under your lower lash line and across the top of the cheekbone directly below your eye. That powder acts as a non-stick surface. Glitter particles that drift downward during application land on the powder instead of your skin. When you’re done with the full look, sweep the powder away with a clean fluffy brush and any glitter fallout comes with it.
This is a formula behavior issue, not a technique issue. Glitter particles are loose until the formula they’re in dries or adheres. Gravity does the rest. The powder barrier is a cleaner fix than any mid-look touch-up.
Nano Banana Prompt [Close-up, high-definition, GRWM-style portrait of a large fluffy brush dusting translucent powder in a soft arc beneath the lower lash line of a fair-skinned eye with slightly hooded lids. The powder catches the light with a soft white mist visible in the air near the brush. Bright bathroom with white tile in the background. No product labels visible.]
Step 4 — Find Your Visible Lid Zone With Your Eyes Open
Most glitter placement errors happen because people apply shadow with their eyes closed, then open them and find the sparkle has vanished under the brow bone. Your visible lid zone is the area you can actually see when your eyes are relaxed and open. That’s your target.
For hooded eyes, the visible lid space is narrower than it looks in the mirror with eyes closed. Place sparkle slightly above where you’d normally locate the crease, concentrated in the center of the lid. Keep the inner and outer corners lighter or bare. This preserves the optical lift and prevents the look from reading heavy.
For monolid eyes, the center-lid concentration works the same way. A soft shimmer at the inner corner adds dimension without requiring a crease to land in.
For downturned eyes, concentrate sparkle on the inner two-thirds of the lid and keep the outer corner lighter. A tiny highlight at the inner corner counterbalances the outer-corner drop.
For almond and standard eye shapes, you have more placement flexibility. Full-lid sparkle works, as does a center-lid highlight over a matte base. Both land well on this eye shape.
“I also have hooded lids and don’t know how I’m supposed to put on eyeshadow.” — Reddit
The answer for hooded lids specifically: check placement with your eyes open after every layer. What you see in the mirror with eyes open is the look. Everything else is just context.
Nano Banana Prompt [Close-up, high-definition, GRWM-style portrait of a person with hooded eyes looking straight ahead, eyes fully open, with a faint pencil mark or shadow placement guide drawn slightly above the natural crease line. Medium skin tone. The lid is unfinished — the guide is the focus, not a completed look. Soft daylight from a window, minimal background detail visible.]
Step 5 — Apply Sparkle Center-First, Pat Don’t Sweep
The motion matters here. Sweeping a brush across glitter disperses it into areas where the primer is too thin to hold the particles. Patting — pressing the product straight down onto the adhesive base — keeps it exactly where you placed it.
For liquid and gel glitter, use the doe-foot applicator or your fingertip. Pat the product onto the center of the visible lid zone, then gently press outward with the tip of your finger or a flat synthetic brush. Build coverage in layers rather than loading more product in one pass.
For pressed glitter, use a flat dense brush that’s been lightly dampened. Press the brush into the pan, tap off any excess, and stamp it onto the lid starting at the center. Work outward from there.
For loose glitter over a tacky primer, use your fingertip or a flat silicone brush. Press the particles straight into the tacky base. Don’t move your finger sideways once it’s touching the lid — press and lift, press and lift.
“Just a tiny dab on the center of my eyelid immediately takes my look from simple to pop princess.” — Cosmopolitan beauty editor
That describes liquid glitter specifically, and it’s accurate. The center-first approach gives you maximum payoff with minimum product.
[AAWP BLOCK 3 — liquid glitter shadows, $6–15 range, including e.l.f. and Stila options]
Nano Banana Prompt [Close-up, high-definition, GRWM-style portrait of a fingertip pressing a dot of silver liquid glitter onto the center of a medium-tan lid with almond eyes. The glitter is wet and highly reflective in the moment of application, catching warm vanity light. The surrounding lid is bare. No product labels or logos visible in the frame.]
Step 6 — Define the Lash Line Without Competing With the Sparkle
Thick liner under glitter reads as visual noise rather than definition. The lash line needs enough presence to anchor the sparkle, not enough to fight it.
Tightlining — pressing liner directly into the base of the upper lash line rather than drawing a line above it — gives definition without consuming any visible lid space. For hooded or mature eyes, this is the preferred approach because it leaves the entire visible lid zone available for sparkle.
If you want a liner stroke above the lash line, keep it thin and lifted at the outer corner. Waterproof formula is required here. Glitter particles can migrate slightly during wear and drag a non-waterproof liner with them.
Mascara goes on last in this step. One coat, roots to tips. Curl your lashes before liner if you have hooded or downturned eyes — lash curl lifts the eye more effectively than any liner placement does, and it creates separation between the lash line and the lower edge of the sparkle zone.
Nano Banana Prompt [Close-up, high-definition, GRWM-style portrait of a thin eyeliner stroke being applied with a fine liner brush along the upper lash line of a fair-skinned eye with slightly hooded lids. The visible lid already has a soft silver sparkle from a previous step. The liner brush tip is mid-stroke, close to the outer corner. Bright daylight from a window, neutral background.]
Step 7 — Set, Seal, and Sweep the Shield
Translucent setting powder on the lid kills glitter payoff, so skip it there. Target only the T-zone and any areas prone to oil if you want to set the rest of your makeup.
Finish with a setting spray held about 8 to 10 inches from your face. Two light passes across the full face. Let it dry without blinking excessively — glitter products that are still slightly tacky can be disrupted by rapid blinking in the first 30 seconds after setting spray lands.
Once the setting spray has dried, take a clean fluffy brush and sweep away the translucent powder shield you laid down in Step 3. The fallout that landed on it comes away with the powder. What’s left is the look.
Check it in natural light before you leave. Sparkle that reads correctly under indoor lighting can look different in direct sun. If the placement seems off in daylight, a small additional press of product at the center of the lid usually resolves it.
Nano Banana Prompt [Close-up, high-definition, GRWM-style portrait of a person mid-application of setting spray, eyes closed, face slightly tilted upward. A fine mist is visible in the air. Medium skin tone, the completed sparkle eye visible on the lids with silver shimmer catching the light. Natural daylight from a nearby window. No product labels visible.]
The Best Products for a Quick Glitter Eyeshadow Tutorial
For an easy sparkly eye makeup for beginners setup, you want three things: a liquid glitter you can apply with a finger, a reliable eyeshadow primer that holds through heat, and a setting spray. That’s a full kit.
For the drugstore tier, the e.l.f. Liquid Glitter Eyeshadow is the lowest-friction starting point available. It doesn’t require a primer, the doe-foot applicator controls placement without a brush, and the formula dries transfer-proof. If you want to step up to pressed glitter, the Pixi Glitter-y Eye Quads are a community-recommended option with dense pigment that applies without glitter glue.
For the prestige tier, Stila Glitter and Glow remains the benchmark liquid glitter after years of editor testing. The formula’s mix of fine shimmer and slightly chunkier glitter particles gives it dimension that single-particle formulas can’t quite match.
[AAWP BLOCK 4 — full product lineup: liquid glitter drugstore, pressed glitter option, eyeshadow primer, setting spray]
Patriotic Eye Makeup Look: Adapting the Sparkle Eye for Memorial Day
A patriotic eye makeup look doesn’t have to mean a literal flag on your face. The most wearable version uses color in a way that reads intentional rather than costumed.
Silver sparkle across the visible lid with a navy or deep blue tightline underneath is the cleanest combination. The silver reads bright and festive in daylight, and the navy liner gives the look a grounded edge that keeps it from reading too precious. Add a white or icy highlight at the inner corner if you want the third color present without layering a separate eyeshadow.
Rose gold is the alternative for anyone who wants warmth rather than cool tones. It doesn’t read patriotic in a traditional sense, but it photographs beautifully in outdoor light, which is the actual condition for most Memorial Day events.
For a full red-white-blue statement look, a navy lid base with silver sparkle pressed onto the center and a red liner across the lower lash line is dramatic and still wearable. Keep the rest of the face minimal if you go this route. The eye is doing enough.
Quick Glitter Eyeshadow Tutorial: Troubleshooting
Glitter fallout collecting under your eyes mid-look. This is a Step 3 failure, not a technique failure. If you didn’t set a powder barrier before application, the fix is a dry fluffy brush sweeping the fallout away and a small amount of concealer if needed. Going forward, do Step 3 first.
Sparkle disappearing when you open your eyes. Placement was too low in the crease. Revisit Step 4 and move your target zone upward, especially if you have hooded or monolid eyes. Apply and check with eyes open after every pass.
Glitter creasing or migrating by hour two. This is a Step 2 failure. A standard eyeshadow primer isn’t holding the formula you’re using. If you’re working with loose or pressed glitter, you need the tacky glitter-specific primer, not a standard lid base.
“Nobody’s instructions matched my face.” — AskMetaFilter
That’s the real problem most quick glitter tutorials don’t solve. The steps above are written for face variation, not for one idealized demo subject.
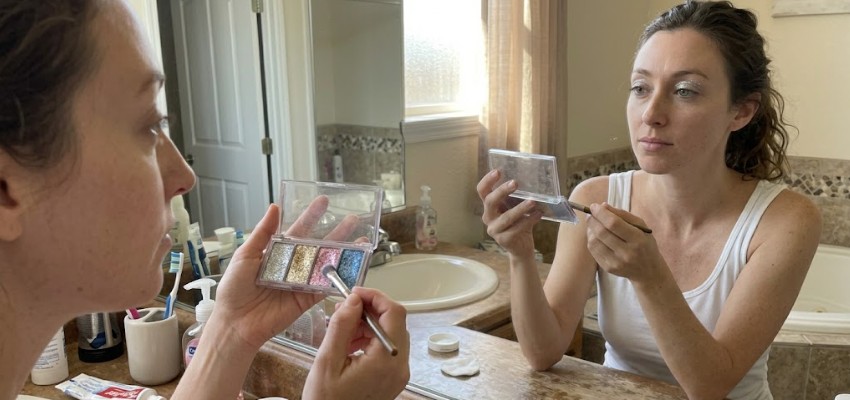
Conclusion
A memorial day sparkle eye makeup look doesn’t require skill you haven’t built yet. It requires the right formula decision before you start, a placement zone that matches your actual eye shape, and one extra step under your eyes that takes 10 seconds. That’s the whole thing.
If you’re new to glitter altogether, start with liquid formula, skip the primer requirement entirely, and put it where you can see it with your eyes open. You’ll get there faster than any ten-step tutorial ever took you.
Easy sparkly eye makeup for beginners isn’t a simplified version of something harder. It’s the same look, with the decisions made in the right order.
FAQ
Can I do a sparkle eye without eyeshadow primer? If you’re using a liquid or gel glitter formula, yes. These formulas self-adhere and don’t require a primer base to hold. If you’re using pressed or loose glitter, primer makes a real difference in how long the look holds, and loose glitter specifically needs a tacky glitter primer rather than a standard one.
How do I do a glitter eye if I have hooded eyelids? Apply and assess placement with your eyes open the entire time. Your visible lid zone is smaller than it looks with eyes closed. Concentrate sparkle at the center of the visible lid, positioned slightly above where you’d normally expect the crease to be. Avoid heavy placement at the inner and outer corners — those areas disappear under the hood.
What’s the difference between shimmer and glitter eyeshadow? Shimmer is finely milled metallic pigment pressed into an eyeshadow formula. Glitter uses larger, more reflective particles that catch light from a distance. Shimmer blends and builds like a standard eyeshadow. Glitter sits on top of the lid rather than blending into it, which is why placement and primer adhesion matter more with glitter than with shimmer.
How do I keep glitter from falling under my eyes? Dust translucent setting powder under your lower lash line before you apply any glitter to the lid. The powder catches loose particles as they fall during application. When you’ve finished the look, sweep the powder away with a clean fluffy brush and the fallout comes with it.
What colors work for a patriotic eye makeup look? Silver sparkle with a navy tightline is the most wearable combination. Icy champagne is a softer alternative that still reads festive in outdoor light. For a full red-white-blue effect, a navy base with silver sparkle at the center and a red lower lash line liner is bold but balanced if you keep the rest of the face minimal.
Poll
Is a 10-minute sparkle eye “real” glitter makeup — or just shimmer with a rebrand?
- It counts. Fast doesn’t mean fake.
- No. Real glitter takes commitment.
- It depends entirely on the product, not the time.
Why did you vote that way? Drop your take below.